




































































Wood Floor Sanding, Explained: The Process, the Costs, and How to Choose a Good Company
Tired, scratched, grey-looking wooden floors can be brought back to life with sanding and refinishing — often looking better than the day they were laid. But before you book anyone, it helps to understand what the job actually involves, roughly what it costs, and how to tell a quality company from a cheap one that’ll leave you with swirl marks and dust everywhere.
This guide walks through the full floor sanding process step by step, the finish options and what each is good for, realistic cost factors, and the specific questions and red flags to check before you hire — so you get a floor you’re proud of, not an expensive disappointment.
The Floor Sanding Process, Step by Step
Understanding the sequence helps you judge whether a company is doing the job properly.
1. Assessment and Preparation
A good floor sander first inspects the boards — checking the wood type, thickness, condition, and how much life is left in the floor (boards can only be sanded a limited number of times). They’ll check for protruding nails, loose boards, gaps, and damage, and punch down any nails that could tear the sanding belt.
2. Gap Filling and Repairs
Loose boards are secured, damaged boards replaced, and gaps between boards filled (with slivers of matching timber or a resin/sawdust filler, depending on the look you want). Skipping this stage leaves a floor that looks unfinished no matter how well it’s sanded.
3. Coarse Sanding (Removing the Old Finish)
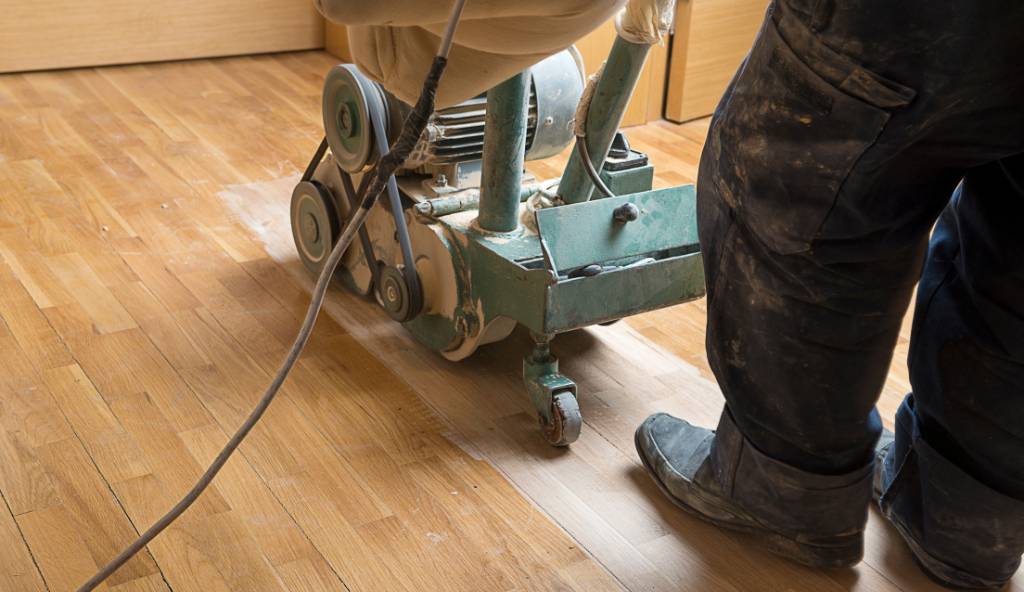
The first pass uses a coarse-grit abrasive to strip old finish, stubborn stains, and the top damaged layer of wood. This is where old varnish, paint, and decades of wear come off.
4. Progressive Fine Sanding
The floor is sanded again with progressively finer grits. This is the step that separates good jobs from bad ones — skipping grits leaves scratches that only show up once the finish goes on. Edges and corners the big machine can’t reach are done with an edging sander.
5. Cleaning
The floor is thoroughly vacuumed and wiped down. Any dust left on the surface ruins the finish, so this step matters more than it sounds.
6. Finishing
The chosen finish (oil, hard-wax oil, or lacquer) is applied in multiple coats, with drying and sometimes light sanding between coats. This is what protects the wood and sets the final look.
The Finish Options Compared
The finish is the biggest decision after choosing to sand at all. Here’s how the main options differ:
Oil (Penetrating Oil)
Soaks into the wood rather than sitting on top, giving a natural, matte look and a lovely feel. Pros: easy to spot-repair, ages gracefully, natural appearance. Cons: needs re-oiling periodically, less resistant to spills than lacquer.
Hard-Wax Oil
A popular middle ground — penetrates like oil but leaves a slightly more protective surface layer. Pros: natural look with better durability than pure oil, repairable. Cons: still needs some maintenance, more expensive.
Lacquer (Varnish)
Sits on top of the wood as a hard protective film. Pros: very durable, hard-wearing, good for high-traffic areas, available in matte to gloss. Cons: when it wears through, the whole floor usually needs re-coating rather than spot-fixing, and scratches are more visible.
The quick rule: lacquer for durability and busy households; oil or hard-wax oil for a natural look and easy repairs.
What Drives the Cost
Floor sanding is usually priced per square metre, and several factors move the price:
- Floor area — larger areas cost more overall but often less per square metre
- Condition — heavily damaged, painted, or previously badly sanded floors take more work
- Floor type — parquet and intricate patterns cost more than standard straight boards
- Finish choice — the number of coats and the finish type affect price
- Repairs and gap filling — extensive board replacement or gap filling adds to the cost
- Access and room complexity — lots of small rooms, stairs, or tricky corners take longer
Getting the floor sanded only (no finish) is cheaper than sanding plus multiple coats of lacquer or oil — so always check exactly what a quote includes.
How to Choose a Good Floor Sanding Company
This is where homeowners most often go wrong. Look for:
- Dust-free (dust-managed) sanding equipment — modern systems capture the vast majority of dust. It’s healthier, cleaner, and a sign of a professional operation.
- A proper assessment before quoting — a good company looks at your actual floor rather than quoting blind.
- A detailed, itemised quote — showing prep, sanding, gap filling, finish type, and number of coats, not just one lump sum.
- Examples of past work and reviews — genuine before/after photos and verifiable customer feedback.
- Clear communication about the finish — they should discuss oil vs lacquer and match it to how you use the room.
- Realistic timeframes — including drying time between coats (rushing finish coats is a common corner-cut).
Red Flags to Avoid
- No assessment, instant quote over the phone for a floor they haven’t seen
- No dust extraction — you’ll be cleaning fine dust out of the house for weeks
- Vague quotes that don’t specify the finish or number of coats
- Prices that seem too good to be true — often meaning skipped grits, cheap finish, or rushed coats
- No references or reviews they can point to
- Pressure to decide immediately without a written quote
Why This Is Usually a Professional Job
Reading through the process makes it clear why DIY floor sanding so often disappoints: the drum sander is powerful and easy to gouge a floor with, skipping grits leaves scratches that only appear after finishing, edge work is fiddly, and finish application is unforgiving of dust and rushing. Professionals bring the right machines, dust extraction, technique, and finish expertise — plus the experience to handle awkward wood and get an even result.
CountDeals has a clear breakdown of exactly why that professional expertise is worth it: the key benefits of investing in professional floor sanding, covering the finish quality, dust-free technology, longevity, and value it adds to your home. If you’re weighing up whether to hire a pro, it’s a useful companion to this guide on how the job actually works.