




































































The Complete Guide to Choosing Laminates: Types, Finishes, Thickness, and Where to Use Each
Walk into any laminate showroom and you’re hit with hundreds of samples, a wall of jargon — HPL, LPL, post-forming, 0.8mm, compact — and a salesperson steering you toward the priciest sheet. Most buyers pick on colour alone, then regret it when the kitchen laminate chips, the glossy wardrobe shows every fingerprint, or the “designer” sheet peels at the edges within a year.
Choosing laminate well isn’t complicated once you understand four things: the type of laminate, the finish, the right thickness, and where each belongs. Get those right and you get surfaces that look premium and survive years of real use. This guide walks through all four in plain language, backed by how the material actually performs — so you buy once and buy right.
First, What Laminate Actually Is
Laminate is a decorative surfacing material bonded onto a base board like MDF, plywood, or particleboard to make it more durable and better-looking. It’s built in layers: kraft paper layers form the core, a printed decorative layer gives the colour and pattern, and a clear protective overlay on top provides resistance to scratches, moisture, and stains. Those layers are fused with resin under heat and pressure.
That construction is why laminate is everywhere in modern interiors — kitchen cabinets, wardrobes, countertops, wall panels, furniture, and more. It resists everyday wear far better than paint or bare wood, comes in a huge range of looks, and costs a fraction of solid stone or real wood veneer. But not all laminate is built the same, which is where type comes in.
The Types of Laminate (This Is the Big One)
The single most important technical choice is between high-pressure and low-pressure laminate. They look similar on the shelf but perform very differently.
High-Pressure Laminate (HPL)
HPL is the durable workhorse. It’s made by bonding six to eight layers of resin-infused kraft paper under intense heat and very high pressure (over 1,000 psi). That dense construction gives it strong impact and abrasion resistance — it shrugs off the bumps, dings, and scrapes that daily life throws at a surface.
HPL is the right choice for anything that gets touched, used, or worked on: kitchen surfaces, countertops, tabletops, high-traffic furniture, and areas that see heavy use. It also offers the widest range of colours, patterns, and textures, and the most realistic wood and stone reproductions, because the decorative layer prints beautifully at this quality level. Typical HPL thickness runs roughly 0.7mm to 1.5mm.
Low-Pressure Laminate (LPL / Melamine)
LPL — often called melamine board or direct-pressure laminate — fuses a single decorative layer directly onto a substrate under lower pressure (around 300–400 psi). It’s faster and cheaper to produce, and cheaper to buy. The trade-off is durability: it’s less resistant to impact and wear and is more prone to chipping and scratching over time. LPL is best for light-to-medium use — cabinet interiors, back panels, low-traffic furniture — where cost matters more than toughness. It’s typically thinner, around 0.3mm to 0.6mm.
Speciality Grades Worth Knowing
Beyond the basic split, several HPL grades solve specific problems:
- Post-forming HPL can be heated and bent around curved edges without cracking — ideal for rounded countertops, reception desks, and seamless benchtops. Maximum thickness around 0.97mm.
- Compact laminate is a thick (roughly 4mm–25mm), self-supporting, double-sided panel that needs no substrate. It’s the go-to for high-moisture, high-traffic settings like bathroom partitions, lockers, and lab benches.
- Fire-retardant (FR) HPL meets fire-safety codes — used in public spaces, healthcare, and transport interiors.
- Chemical-resistant HPL withstands solvents and harsh cleaners, for labs and industrial settings.
For most home projects, general-purpose HPL for exposed surfaces plus cheaper LPL or thin liner laminate for hidden interiors is the smart, cost-effective combination.
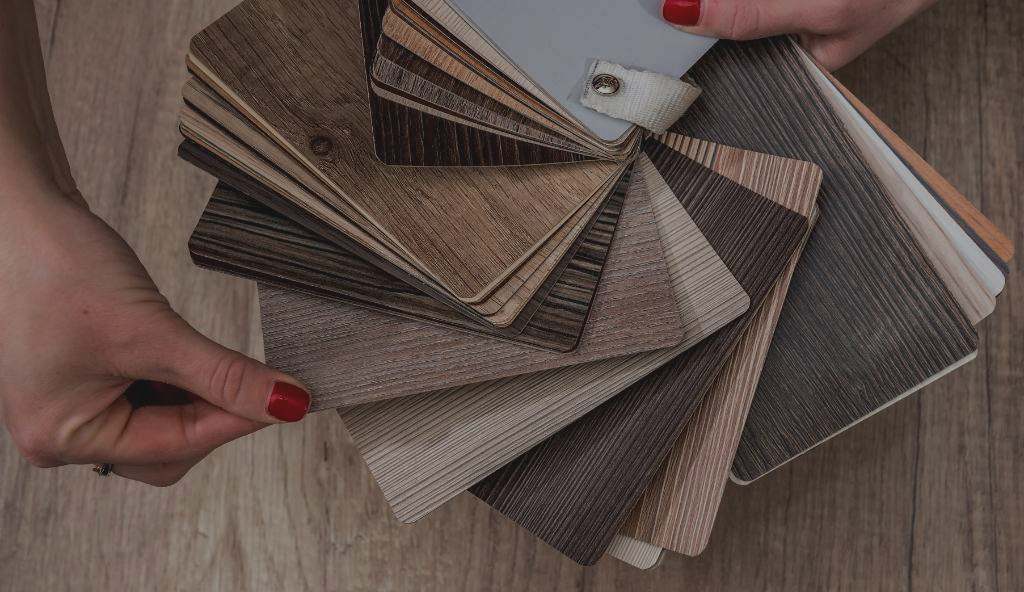
The Finish: Matte vs Glossy vs Textured
After type, finish is the decision that most shapes both the look and the day-to-day livability of a surface. There’s no universally “better” finish — each wins in different situations.
Glossy Laminates
High-gloss laminates have a shiny, reflective surface that reads as luxurious and modern. Their big practical advantages:
- They make spaces feel bigger and brighter. The reflective surface bounces natural and artificial light, creating depth and openness — excellent for small or dark rooms.
- They make bold, deep colours pop. Rich hues look their best in gloss.
- They wipe clean easily. The smooth, non-porous surface means dust and spills wipe straight off.
The downsides are real, though: glossy surfaces show fingerprints, smudges, and dust readily, so they need frequent wiping to stay flawless, and scratches are far more visible on a reflective surface than a matte one. Gloss suits feature areas — wardrobe shutters, cabinet fronts, statement furniture.
Matte Laminates
Matte laminates have a soft, non-reflective surface prized for understated, contemporary elegance. Their strengths are almost the mirror image of gloss:
- They hide imperfections. The non-reflective surface is highly resistant to showing scratches, smudges, and fingerprints — a genuine advantage in busy homes with kids or pets.
- They give a natural, warm look. Matte mimics real wood and stone convincingly and suits rustic, Scandinavian, and minimalist styles.
- They reduce glare. In rooms with lots of light, matte softens harsh reflections for a calmer feel.
The trade-offs: matte can look less “clean” or vibrant than gloss in formal spaces, it won’t brighten a dark room the way gloss does, and — depending on the specific product — some matte surfaces can hold onto certain stains a little more, so they benefit from regular cleaning.
Textured Laminates
Textured finishes add tactile surface patterns — woodgrain, stone, suede, embossed effects — that bring realism and depth. They’re excellent when you want the feel as well as the look of natural materials, and they hide fingerprints and minor wear well.
The Pro Move: Mix Finishes
You don’t have to choose one. A growing designer trend pairs glossy laminates on feature elements (cabinet shutters, wardrobes, furniture fronts) with matte on adjacent surfaces (islands, wall panels, countertops). Gloss brings brilliance and depth; matte brings warmth and texture. The one rule for making it work: keep a consistent colour scheme across both finishes so the contrast reads as intentional and harmonious rather than clashing.
Getting the Thickness Right
Thickness isn’t just about durability — matching it to the application saves money and prevents premature wear. A practical guide for home interiors:
- ~0.7mm (liner laminate): For internal, non-contact surfaces — cabinet interiors, back panels, decorative lining. Not for exposed, frequently-touched surfaces.
- ~0.8mm (standard): The everyday standard for most furniture and interior surfaces — wardrobes, storage units, general furniture. A good default for residential work.
- ~1mm: Recommended for kitchens and high-use residential areas that take more abuse and moisture.
- ~1.5mm and acrylic/premium options: For premium, high-impact spaces where both durability and a rich finish matter.
- Compact (4mm+): Self-supporting panels for wet or heavy-duty areas.
The principle: put the thickness where the wear is. Using 1mm on a kitchen benchtop and a cheaper liner laminate inside the cabinets is smarter than paying for premium sheets on surfaces no one touches.
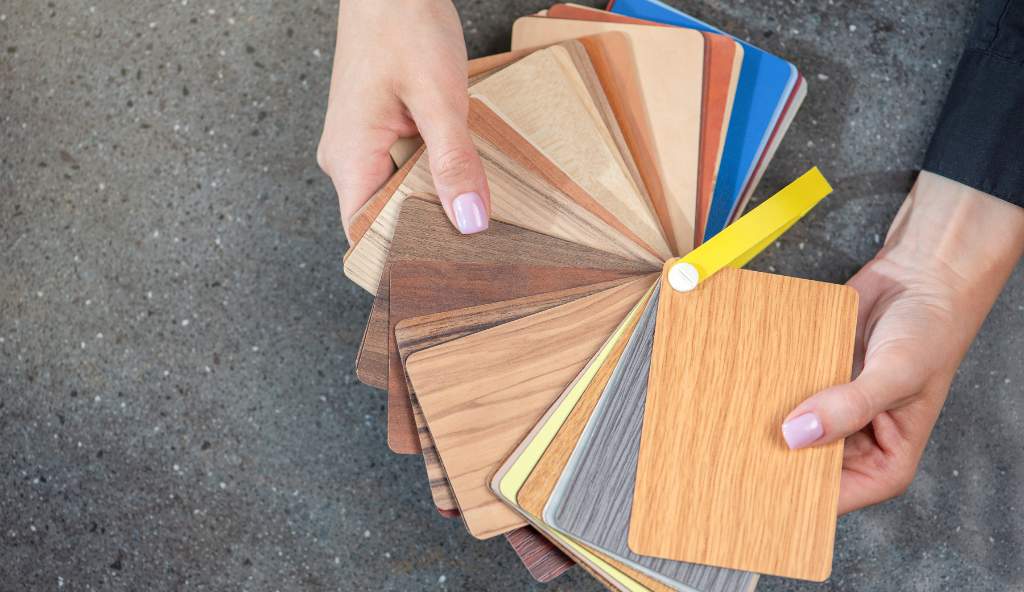
Where to Use What: A Room-by-Room Cheat Sheet
Pulling it together, here’s how the choices map to real spaces:
- Kitchen cabinets and countertops: HPL, ~1mm, moisture-resistant. Matte or textured hides everyday marks; gloss fronts look striking but need more wiping. Post-forming HPL for curved edges.
- Wardrobes: HPL ~0.8mm on exteriors; gloss for a statement, matte for calm. Liner laminate inside.
- Bathrooms / wet areas: Compact laminate or moisture-resistant HPL — never standard LPL.
- Wall panels and feature walls: HPL in textured or gloss for impact; mix finishes for depth.
- Kids’ rooms and study desks: Matte, scratch-resistant HPL — hides marks and resists abuse.
- Low-traffic / hidden surfaces: LPL or liner laminate to save cost.
- Commercial / public spaces: FR-grade HPL where fire codes apply; compact for partitions and lockers.
How to Judge Laminate Quality Before You Buy
Samples can be deceiving. A few checks help you avoid a poor sheet:
- Confirm the type and grade, not just the look — ask whether it’s HPL or LPL and the thickness in mm. A “designer” LPL is still LPL.
- Check the protective overlay, which drives scratch and stain resistance. Reputable ranges specify their surface performance.
- Look for consistent thickness and a clean edge on the sample — flimsy or uneven sheets signal lower quality.
- Match the grade to the use — don’t put vertical-grade or thin liner laminate on a horizontal work surface.
- Consider the substrate too. Even the best laminate fails if bonded to poor-quality or moisture-swollen board; MDF and plywood cores behave differently in wet areas.
- Buy a little extra from the same batch for repairs and to allow for offcuts, since dye lots can vary slightly.
Balancing Cost: Where to Spend and Where to Save
Laminate is already a budget-friendly surfacing choice compared to solid wood veneer, natural stone, or acrylic — but within laminate there’s a wide price range, and knowing where to spend makes a real difference to both your budget and the final result.
The general rule: spend on visible, high-use surfaces and save on hidden, low-use ones. A kitchen benchtop, wardrobe front, or dining tabletop earns premium HPL, a durable finish, and the right thickness, because that’s what people see and touch daily and what suffers the most wear. Cabinet interiors, drawer boxes, back panels, and the undersides of furniture don’t need designer sheets — a cheaper LPL or thin liner laminate does the job invisibly and cuts the bill noticeably.
A few cost principles worth keeping in mind:
- Designer and speciality finishes cost more, so reserve them for feature pieces rather than covering an entire room. One statement wardrobe in a bold designer laminate creates more impact than the same laminate spread thinly everywhere.
- Thicker isn’t always better value. Paying for 1.5mm sheets on a low-traffic wardrobe wastes money; 0.8mm is plenty. Match thickness to use.
- Factor in installation, not just the sheet. HPL’s thickness and rigidity often require skilled fitting, while LPL is easier to handle — labour is part of the true cost.
- The cheapest sheet is rarely the cheapest long-term. A low-grade laminate that chips, swells, or peels within a couple of years costs more than a mid-grade one that lasts a decade, once you count replacement and disruption.
Think of it as a budget you allocate rather than a single price you pay: concentrate quality where it’s seen and used, economise where it isn’t, and the overall project looks premium without a premium-everywhere cost.
Common Laminate Mistakes to Avoid
Even good laminate disappoints when these avoidable errors creep in:
- Choosing on colour alone. The most common mistake — picking a sheet for its look without checking type, grade, or thickness, then being surprised when it doesn’t hold up.
- Putting gloss where it’ll frustrate you. High-gloss on a busy kitchen surface or a low table means constant fingerprint-wiping. Beautiful in the showroom, tiring at home.
- Using LPL or liner laminate on work surfaces. Thin, low-pressure sheets on a horizontal, high-use surface chip and wear fast.
- Ignoring the edges. Unsealed edges and joints are where moisture gets in and causes swelling and peeling — the single biggest cause of laminate failure. Proper edge-banding and sealing matter as much as the sheet itself.
- Skimping on the substrate. Bonding quality laminate to cheap or moisture-prone board undermines the whole surface, especially in wet areas.
- Not ordering enough. Running short mid-project and getting a slightly different dye lot leaves visible mismatches.
- Over-buying premium everywhere. The opposite error — paying for top-grade designer sheets on surfaces nobody sees, inflating cost without benefit.
Avoid these seven and most laminate regrets simply don’t happen.
Care and Maintenance (So It Lasts)
Laminate is low-maintenance, not no-maintenance:
- Clean with a soft, damp cloth and mild cleaner; wipe spills promptly, especially on matte.
- Avoid abrasive scourers and harsh chemicals that can dull the overlay — unless it’s chemical-resistant grade.
- Don’t cut directly on laminate countertops or set very hot pans straight onto them; use boards and trivets.
- Seal edges and joints properly during installation — unsealed edges let moisture into the core, the most common cause of swelling and peeling.
- Deal with lifting edges early before moisture spreads under the sheet.
Done right, quality HPL keeps its appearance and performance for many years with just routine cleaning.
Designer Laminate Collections: Where Style Meets the Basics
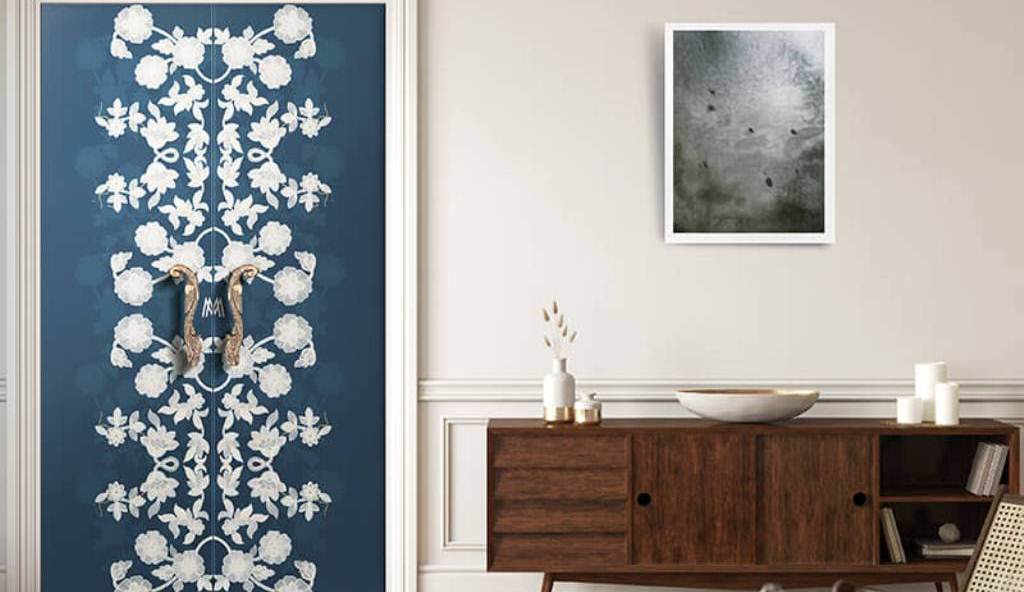
Once you understand type, finish, and thickness, the fun part is choosing a look — and this is where designer laminate collections shine. Beyond standard woodgrains and solids, premium ranges now offer artistic, fashion-led designs: bold patterns, monograms, tradition-inspired motifs, and curated palettes that turn ordinary furniture into a statement. These “fashion for your furniture” collections bring couture sensibility to everyday surfaces, letting you mix and match distinctive designs across a room.
A striking example of this fashion-meets-furniture direction is the designer laminate range created by CenturyPly in partnership with couturier Manish Malhotra. If you want to see how high design translates into laminate — across sub-ranges like the elegant Elegante, the eclectic Fusion, and the exclusive Insignia, each in matte and gloss finishes — CountDeals has a useful overview of the design principles behind the Manish Malhotra laminates collection. It’s a good look at how far decorative laminate has come from plain woodgrain, and a source of inspiration once you’ve nailed down the practical choices in this guide.
The Complete Guide to Choosing Laminates: Types, Finishes, Thickness, and Where to Use Each
Walk into any laminate showroom and you’re hit with hundreds of samples, a wall of jargon — HPL, LPL, post-forming, 0.8mm, compact — and a salesperson steering you toward the priciest sheet. Most buyers pick on colour alone, then regret it when the kitchen laminate chips, the glossy wardrobe shows every fingerprint, or the “designer” sheet peels at the edges within a year.
Choosing laminate well isn’t complicated once you understand four things: the type of laminate, the finish, the right thickness, and where each belongs. Get those right and you get surfaces that look premium and survive years of real use. This guide walks through all four in plain language, backed by how the material actually performs — so you buy once and buy right.
First, What Laminate Actually Is
Laminate is a decorative surfacing material bonded onto a base board like MDF, plywood, or particleboard to make it more durable and better-looking. It’s built in layers: kraft paper layers form the core, a printed decorative layer gives the colour and pattern, and a clear protective overlay on top provides resistance to scratches, moisture, and stains. Those layers are fused with resin under heat and pressure.
That construction is why laminate is everywhere in modern interiors — kitchen cabinets, wardrobes, countertops, wall panels, furniture, and more. It resists everyday wear far better than paint or bare wood, comes in a huge range of looks, and costs a fraction of solid stone or real wood veneer. But not all laminate is built the same, which is where type comes in.
The Types of Laminate (This Is the Big One)
The single most important technical choice is between high-pressure and low-pressure laminate. They look similar on the shelf but perform very differently.
High-Pressure Laminate (HPL)
HPL is the durable workhorse. It’s made by bonding six to eight layers of resin-infused kraft paper under intense heat and very high pressure (over 1,000 psi). That dense construction gives it strong impact and abrasion resistance — it shrugs off the bumps, dings, and scrapes that daily life throws at a surface.
HPL is the right choice for anything that gets touched, used, or worked on: kitchen surfaces, countertops, tabletops, high-traffic furniture, and areas that see heavy use. It also offers the widest range of colours, patterns, and textures, and the most realistic wood and stone reproductions, because the decorative layer prints beautifully at this quality level. Typical HPL thickness runs roughly 0.7mm to 1.5mm.
Low-Pressure Laminate (LPL / Melamine)
LPL — often called melamine board or direct-pressure laminate — fuses a single decorative layer directly onto a substrate under lower pressure (around 300–400 psi). It’s faster and cheaper to produce, and cheaper to buy. The trade-off is durability: it’s less resistant to impact and wear and is more prone to chipping and scratching over time. LPL is best for light-to-medium use — cabinet interiors, back panels, low-traffic furniture — where cost matters more than toughness. It’s typically thinner, around 0.3mm to 0.6mm.
Speciality Grades Worth Knowing
Beyond the basic split, several HPL grades solve specific problems:
- Post-forming HPL can be heated and bent around curved edges without cracking — ideal for rounded countertops, reception desks, and seamless benchtops. Maximum thickness around 0.97mm.
- Compact laminate is a thick (roughly 4mm–25mm), self-supporting, double-sided panel that needs no substrate. It’s the go-to for high-moisture, high-traffic settings like bathroom partitions, lockers, and lab benches.
- Fire-retardant (FR) HPL meets fire-safety codes — used in public spaces, healthcare, and transport interiors.
- Chemical-resistant HPL withstands solvents and harsh cleaners, for labs and industrial settings.
For most home projects, general-purpose HPL for exposed surfaces plus cheaper LPL or thin liner laminate for hidden interiors is the smart, cost-effective combination.
The Finish: Matte vs Glossy vs Textured
After type, finish is the decision that most shapes both the look and the day-to-day livability of a surface. There’s no universally “better” finish — each wins in different situations.
Glossy Laminates
High-gloss laminates have a shiny, reflective surface that reads as luxurious and modern. Their big practical advantages:
- They make spaces feel bigger and brighter. The reflective surface bounces natural and artificial light, creating depth and openness — excellent for small or dark rooms.
- They make bold, deep colours pop. Rich hues look their best in gloss.
- They wipe clean easily. The smooth, non-porous surface means dust and spills wipe straight off.
The downsides are real, though: glossy surfaces show fingerprints, smudges, and dust readily, so they need frequent wiping to stay flawless, and scratches are far more visible on a reflective surface than a matte one. Gloss suits feature areas — wardrobe shutters, cabinet fronts, statement furniture.
Matte Laminates
Matte laminates have a soft, non-reflective surface prized for understated, contemporary elegance. Their strengths are almost the mirror image of gloss:
- They hide imperfections. The non-reflective surface is highly resistant to showing scratches, smudges, and fingerprints — a genuine advantage in busy homes with kids or pets.
- They give a natural, warm look. Matte mimics real wood and stone convincingly and suits rustic, Scandinavian, and minimalist styles.
- They reduce glare. In rooms with lots of light, matte softens harsh reflections for a calmer feel.
The trade-offs: matte can look less “clean” or vibrant than gloss in formal spaces, it won’t brighten a dark room the way gloss does, and — depending on the specific product — some matte surfaces can hold onto certain stains a little more, so they benefit from regular cleaning.
Textured Laminates
Textured finishes add tactile surface patterns — woodgrain, stone, suede, embossed effects — that bring realism and depth. They’re excellent when you want the feel as well as the look of natural materials, and they hide fingerprints and minor wear well.
The Pro Move: Mix Finishes
You don’t have to choose one. A growing designer trend pairs glossy laminates on feature elements (cabinet shutters, wardrobes, furniture fronts) with matte on adjacent surfaces (islands, wall panels, countertops). Gloss brings brilliance and depth; matte brings warmth and texture. The one rule for making it work: keep a consistent colour scheme across both finishes so the contrast reads as intentional and harmonious rather than clashing.
Getting the Thickness Right
Thickness isn’t just about durability — matching it to the application saves money and prevents premature wear. A practical guide for home interiors:
- ~0.7mm (liner laminate): For internal, non-contact surfaces — cabinet interiors, back panels, decorative lining. Not for exposed, frequently-touched surfaces.
- ~0.8mm (standard): The everyday standard for most furniture and interior surfaces — wardrobes, storage units, general furniture. A good default for residential work.
- ~1mm: Recommended for kitchens and high-use residential areas that take more abuse and moisture.
- ~1.5mm and acrylic/premium options: For premium, high-impact spaces where both durability and a rich finish matter.
- Compact (4mm+): Self-supporting panels for wet or heavy-duty areas.
The principle: put the thickness where the wear is. Using 1mm on a kitchen benchtop and a cheaper liner laminate inside the cabinets is smarter than paying for premium sheets on surfaces no one touches.
Where to Use What: A Room-by-Room Cheat Sheet
Pulling it together, here’s how the choices map to real spaces:
- Kitchen cabinets and countertops: HPL, ~1mm, moisture-resistant. Matte or textured hides everyday marks; gloss fronts look striking but need more wiping. Post-forming HPL for curved edges.
- Wardrobes: HPL ~0.8mm on exteriors; gloss for a statement, matte for calm. Liner laminate inside.
- Bathrooms / wet areas: Compact laminate or moisture-resistant HPL — never standard LPL.
- Wall panels and feature walls: HPL in textured or gloss for impact; mix finishes for depth.
- Kids’ rooms and study desks: Matte, scratch-resistant HPL — hides marks and resists abuse.
- Low-traffic / hidden surfaces: LPL or liner laminate to save cost.
- Commercial / public spaces: FR-grade HPL where fire codes apply; compact for partitions and lockers.
How to Judge Laminate Quality Before You Buy
Samples can be deceiving. A few checks help you avoid a poor sheet:
- Confirm the type and grade, not just the look — ask whether it’s HPL or LPL and the thickness in mm. A “designer” LPL is still LPL.
- Check the protective overlay, which drives scratch and stain resistance. Reputable ranges specify their surface performance.
- Look for consistent thickness and a clean edge on the sample — flimsy or uneven sheets signal lower quality.
- Match the grade to the use — don’t put vertical-grade or thin liner laminate on a horizontal work surface.
- Consider the substrate too. Even the best laminate fails if bonded to poor-quality or moisture-swollen board; MDF and plywood cores behave differently in wet areas.
- Buy a little extra from the same batch for repairs and to allow for offcuts, since dye lots can vary slightly.
Balancing Cost: Where to Spend and Where to Save
Laminate is already a budget-friendly surfacing choice compared to solid wood veneer, natural stone, or acrylic — but within laminate there’s a wide price range, and knowing where to spend makes a real difference to both your budget and the final result.
The general rule: spend on visible, high-use surfaces and save on hidden, low-use ones. A kitchen benchtop, wardrobe front, or dining tabletop earns premium HPL, a durable finish, and the right thickness, because that’s what people see and touch daily and what suffers the most wear. Cabinet interiors, drawer boxes, back panels, and the undersides of furniture don’t need designer sheets — a cheaper LPL or thin liner laminate does the job invisibly and cuts the bill noticeably.
A few cost principles worth keeping in mind:
- Designer and speciality finishes cost more, so reserve them for feature pieces rather than covering an entire room. One statement wardrobe in a bold designer laminate creates more impact than the same laminate spread thinly everywhere.
- Thicker isn’t always better value. Paying for 1.5mm sheets on a low-traffic wardrobe wastes money; 0.8mm is plenty. Match thickness to use.
- Factor in installation, not just the sheet. HPL’s thickness and rigidity often require skilled fitting, while LPL is easier to handle — labour is part of the true cost.
- The cheapest sheet is rarely the cheapest long-term. A low-grade laminate that chips, swells, or peels within a couple of years costs more than a mid-grade one that lasts a decade, once you count replacement and disruption.
Think of it as a budget you allocate rather than a single price you pay: concentrate quality where it’s seen and used, economise where it isn’t, and the overall project looks premium without a premium-everywhere cost.
Common Laminate Mistakes to Avoid
Even good laminate disappoints when these avoidable errors creep in:
- Choosing on colour alone. The most common mistake — picking a sheet for its look without checking type, grade, or thickness, then being surprised when it doesn’t hold up.
- Putting gloss where it’ll frustrate you. High-gloss on a busy kitchen surface or a low table means constant fingerprint-wiping. Beautiful in the showroom, tiring at home.
- Using LPL or liner laminate on work surfaces. Thin, low-pressure sheets on a horizontal, high-use surface chip and wear fast.
- Ignoring the edges. Unsealed edges and joints are where moisture gets in and causes swelling and peeling — the single biggest cause of laminate failure. Proper edge-banding and sealing matter as much as the sheet itself.
- Skimping on the substrate. Bonding quality laminate to cheap or moisture-prone board undermines the whole surface, especially in wet areas.
- Not ordering enough. Running short mid-project and getting a slightly different dye lot leaves visible mismatches.
- Over-buying premium everywhere. The opposite error — paying for top-grade designer sheets on surfaces nobody sees, inflating cost without benefit.
Avoid these seven and most laminate regrets simply don’t happen.
Care and Maintenance (So It Lasts)
Laminate is low-maintenance, not no-maintenance:
- Clean with a soft, damp cloth and mild cleaner; wipe spills promptly, especially on matte.
- Avoid abrasive scourers and harsh chemicals that can dull the overlay — unless it’s chemical-resistant grade.
- Don’t cut directly on laminate countertops or set very hot pans straight onto them; use boards and trivets.
- Seal edges and joints properly during installation — unsealed edges let moisture into the core, the most common cause of swelling and peeling.
- Deal with lifting edges early before moisture spreads under the sheet.
Done right, quality HPL keeps its appearance and performance for many years with just routine cleaning.
Designer Laminate Collections: Where Style Meets the Basics
Once you understand type, finish, and thickness, the fun part is choosing a look — and this is where designer laminate collections shine. Beyond standard woodgrains and solids, premium ranges now offer artistic, fashion-led designs: bold patterns, monograms, tradition-inspired motifs, and curated palettes that turn ordinary furniture into a statement. These “fashion for your furniture” collections bring couture sensibility to everyday surfaces, letting you mix and match distinctive designs across a room.
A striking example of this fashion-meets-furniture direction is the designer laminate range created by CenturyPly in partnership with couturier Manish Malhotra. If you want to see how high design translates into laminate — across sub-ranges like the elegant Elegante, the eclectic Fusion, and the exclusive Insignia, each in matte and gloss finishes — CountDeals has a useful overview of the design principles behind the Manish Malhotra laminates collection. It’s a good look at how far decorative laminate has come from plain woodgrain, and a source of inspiration once you’ve nailed down the practical choices in this guide.laminate countertops